


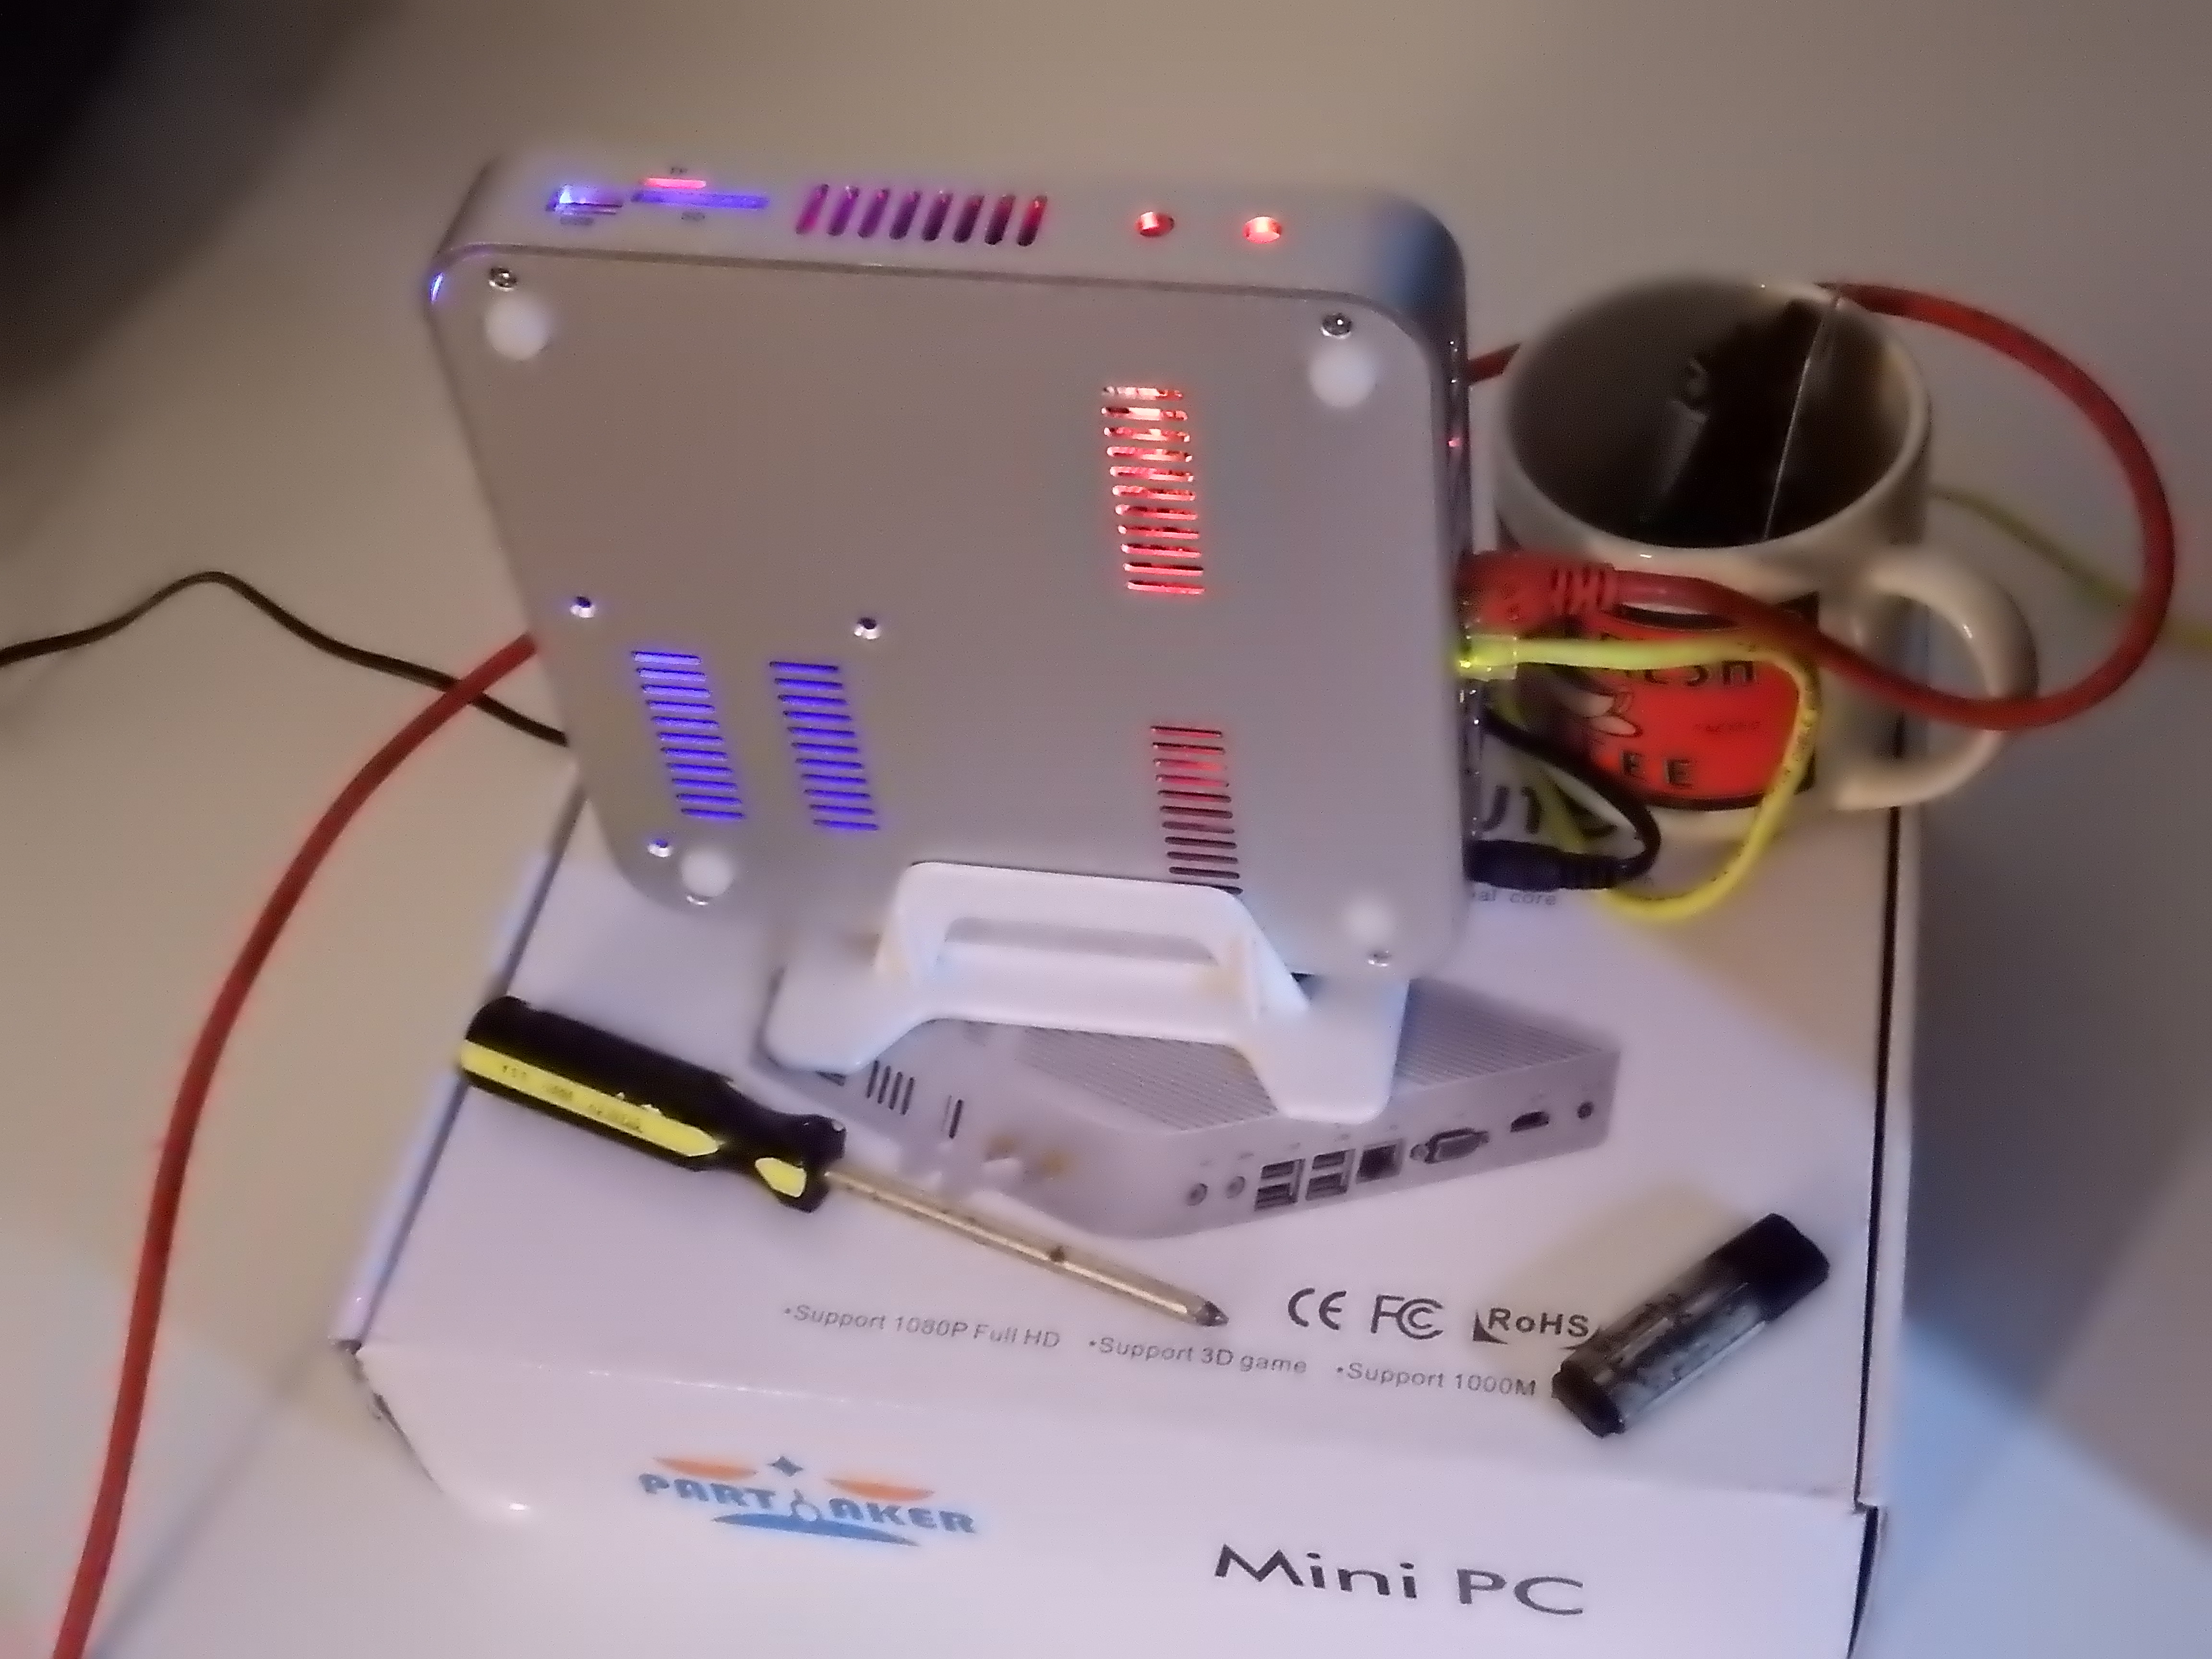
The Homebrew Special—looking a bit blurry, because I wanted to take a low-light shot to try to capture the disco glow.
2 more images in gallery
After finally reaching the tipping point with off-the-shelf solutions that can't match increasing speeds available, we recently took the plunge. Building a homebrew routerturned out to be a better proposition than we could've ever imagined. With nearly any speed metric we analyzed, our little DIY kit outpaced routers whether they were of the $90- or $250-variety.
Naturally, many readers asked the obvious follow-up—"How exactly can we put that together?" Today it's time to finally pull back the curtain and offer that walkthrough. By taking a closer look at the actual build itself (hardware and software), the testing processes we used, and why we used them, hopefully any Ars readers of average technical abilities will be able to put together their own DIY speed machine. And the good news? Everything is as open source as it gets—the equipment, the processes, and the setup. If you want the DIY router we used, you can absolutely have it. This will be the guide to lead you, step-by-step.
What is a router, anyway?
At its most basic, a router is just a device that accepts packets on one interface and forwards them on to another interface that gets those packets closer to their eventual destination. That's not what most of us are really thinking when we think of "a router" in the sense of something we'll plug into our home or office to get to the Internet, though. What do we need to have before any homebrew device looks like a router?
For most of us, the important bits will be routing, NAT, DHCP, and DNS. In this build, we'll use the same free and open source implementations of these technologies that power huge chunks of the Internet infrastructure itself.
Routing
This one's easy—the Linux kernel itself handles it for us without any additional software. We're not looking for any complex multiple-route stuff that would need Border Gateway Protocol or the like, so we can basically just enable forwarding between interfaces, set up a few rules to tell us when not to forward between interfaces, and call it a day.
Network Address Translation
In a nutshell, NAT lets you access routeable (Internet) IP addresses from non-routeable (local, private) IP addresses. A router does this by accepting traffic from the LAN, substituting its own public IP address for the LAN IP address the packet came from, and sending the packet on to the Internet. When replies to the packet come back to the router, the router looks up which LAN IP address the original packet came from, puts that IP address back into the packet in place of its own, and forwards the packet back to the original machine.
We need NAT because we don't have enough public IP addresses for every personal computer and device out there, not by a long shot. IPv6 will change all that, but when we make the final switchover to IPv6... well, your guess is as good as mine. We aren't going to even try to cover IPv6 in this article; it's a complicated matter. For now, we'll note that we need NAT, the Linux kernel makes that available as the MASQUERADE function of iptables, and move on.
Dynamic Host Configuration Protocol
Yep, that's what "DHCP" stands for. The DHCP server in a consumer router hands out IP addresses, default gateway information, network and broadcast addresses, and DNS server addresses. We want our router to do the same thing for us—which the Internet Software Consortium's own reference DHCP service will do just fine.
Domain Name Service
You don't strictly need to have local DNS service on your router. You could just tell all of your clients to use a publicly available DNS resolution service, like Verizon's 4.2.2.4 or Google's 8.8.8.8. Still, it's certainly nice to have. We're going to go old school here and use the same DNS server application that the Internet itself does: BIND, the Berkeley Internet Name Daemon. Having our own DNS server locally means that we'll typically get DNS queries resolved faster, more accurately, and in strict accordance with caching and expiration protocols set in the domain names themselves when compared to using somebody else's DNS server. It also means less total DNS traffic since we're doing that caching locally.
Router hardware
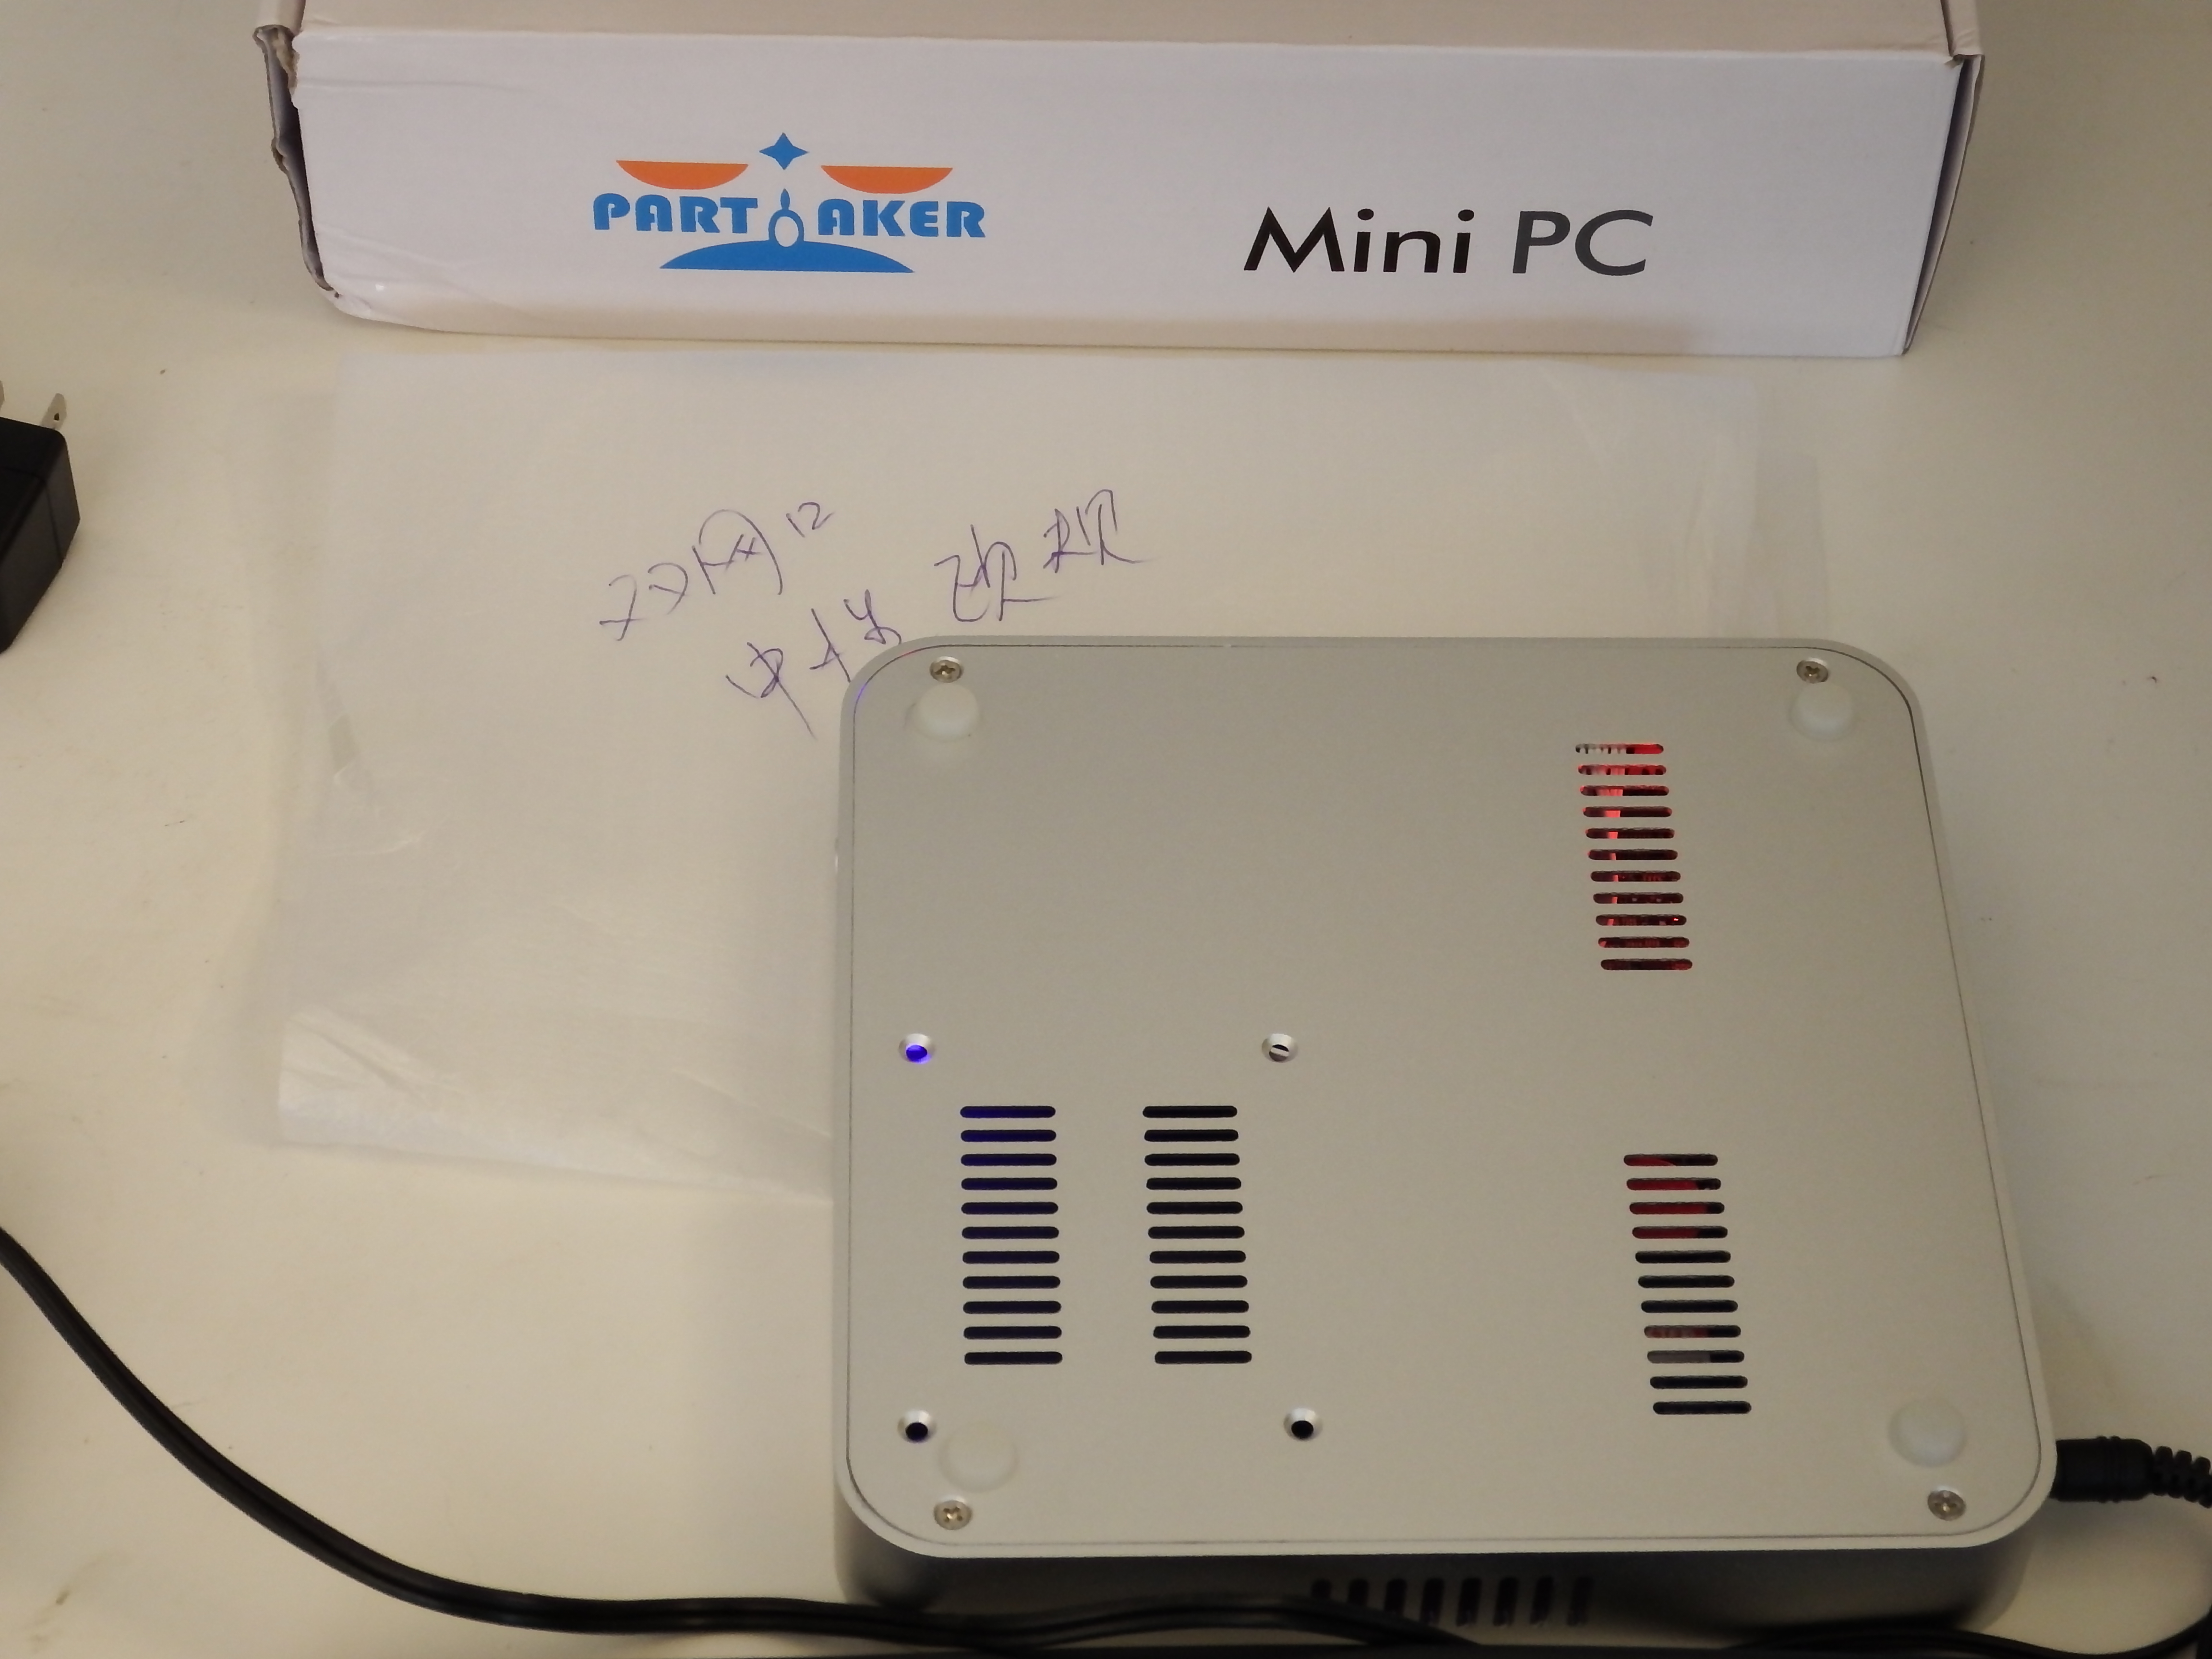
As we disclosed last time, this decision was pretty simple: a dual-gigabit-NIC mini-PC from Alibabaand an inexpensive SSD from Newegg.
Those particular choices sparked a lot of comments. Was this the absolute least expensive possible setup? No, definitely not. So why did I use the pieces I did? For one thing, I wasn't actually sure where the homebrew would end up on the performance spectrum. I wanted to get an efficient but relatively powerful CPU... the kind you'd find in, say, an Intel-based Chromebook.
Looking for a high-performing CPU ruled out older Atom-based nettops, which are notoriously anemic for x86 CPUs. It didn't necessarily rule out parts like PCEngines' AMD Bobcat-based apu1d4, but that just wasn't quite what I wanted to play with on the first go-round. The Ivy Bridge Celeron I got was exactly what I wanted—about as high performance as you can get while staying easy on the power bill.
There was one other personal "pro" about buying from an Alibaba vendor. My kids attend a Mandarin language immersion school, and it was kind of awesome discovering a handwritten note on the inside of the packaging, showing it to my kids, and telling them this was actually written by a person in China who was building the new thing Daddy got. (I'm told that the handwriting translates to "high performance computer with two networks," but I don't speak Chinese, and my kids' teacher doesn't speak nerd. There could be something lost in the translation.)
With the other parts selected, let's start with the 120GB SSD. That's laughable overkill, right? Well, yes, it's absolutely way more storage than you need for a router. But I wanted solid state both for fast boot times and for not being reliant on a spinning chunk of rust. I also wanted a brand I know, since really dodgy SSDs can be, well, really dodgy. That ruled out the $20 no-brand SSDs I could have found on Alibaba itself. And when I went shopping for SSDs from known brands, what I found was that dropping from 120GB to 32GB would only have saved me $5, if that. I went with the 120GB Kingston, and as a nice bonus, I now don't have to worry about accumulated kernels from security updates filling up my root partition and screwing things up.
In theory, I could have used a cheap SD card instead of the SSD. But in practice, the Alibaba page didn't specify whether the BIOS was capable of actually booting from SD or not, so I didn't want to rely on it. (I did check when I got the router in hand, and yes, it will boot from SD just fine). SD cards also tend to be noticeably slower than SSDs. This doesn't matter for the operation of the router, but it does matter for reboot times. (Plus, hey, I wanted to spoil myself! 120GB Kingston SSD it was.)
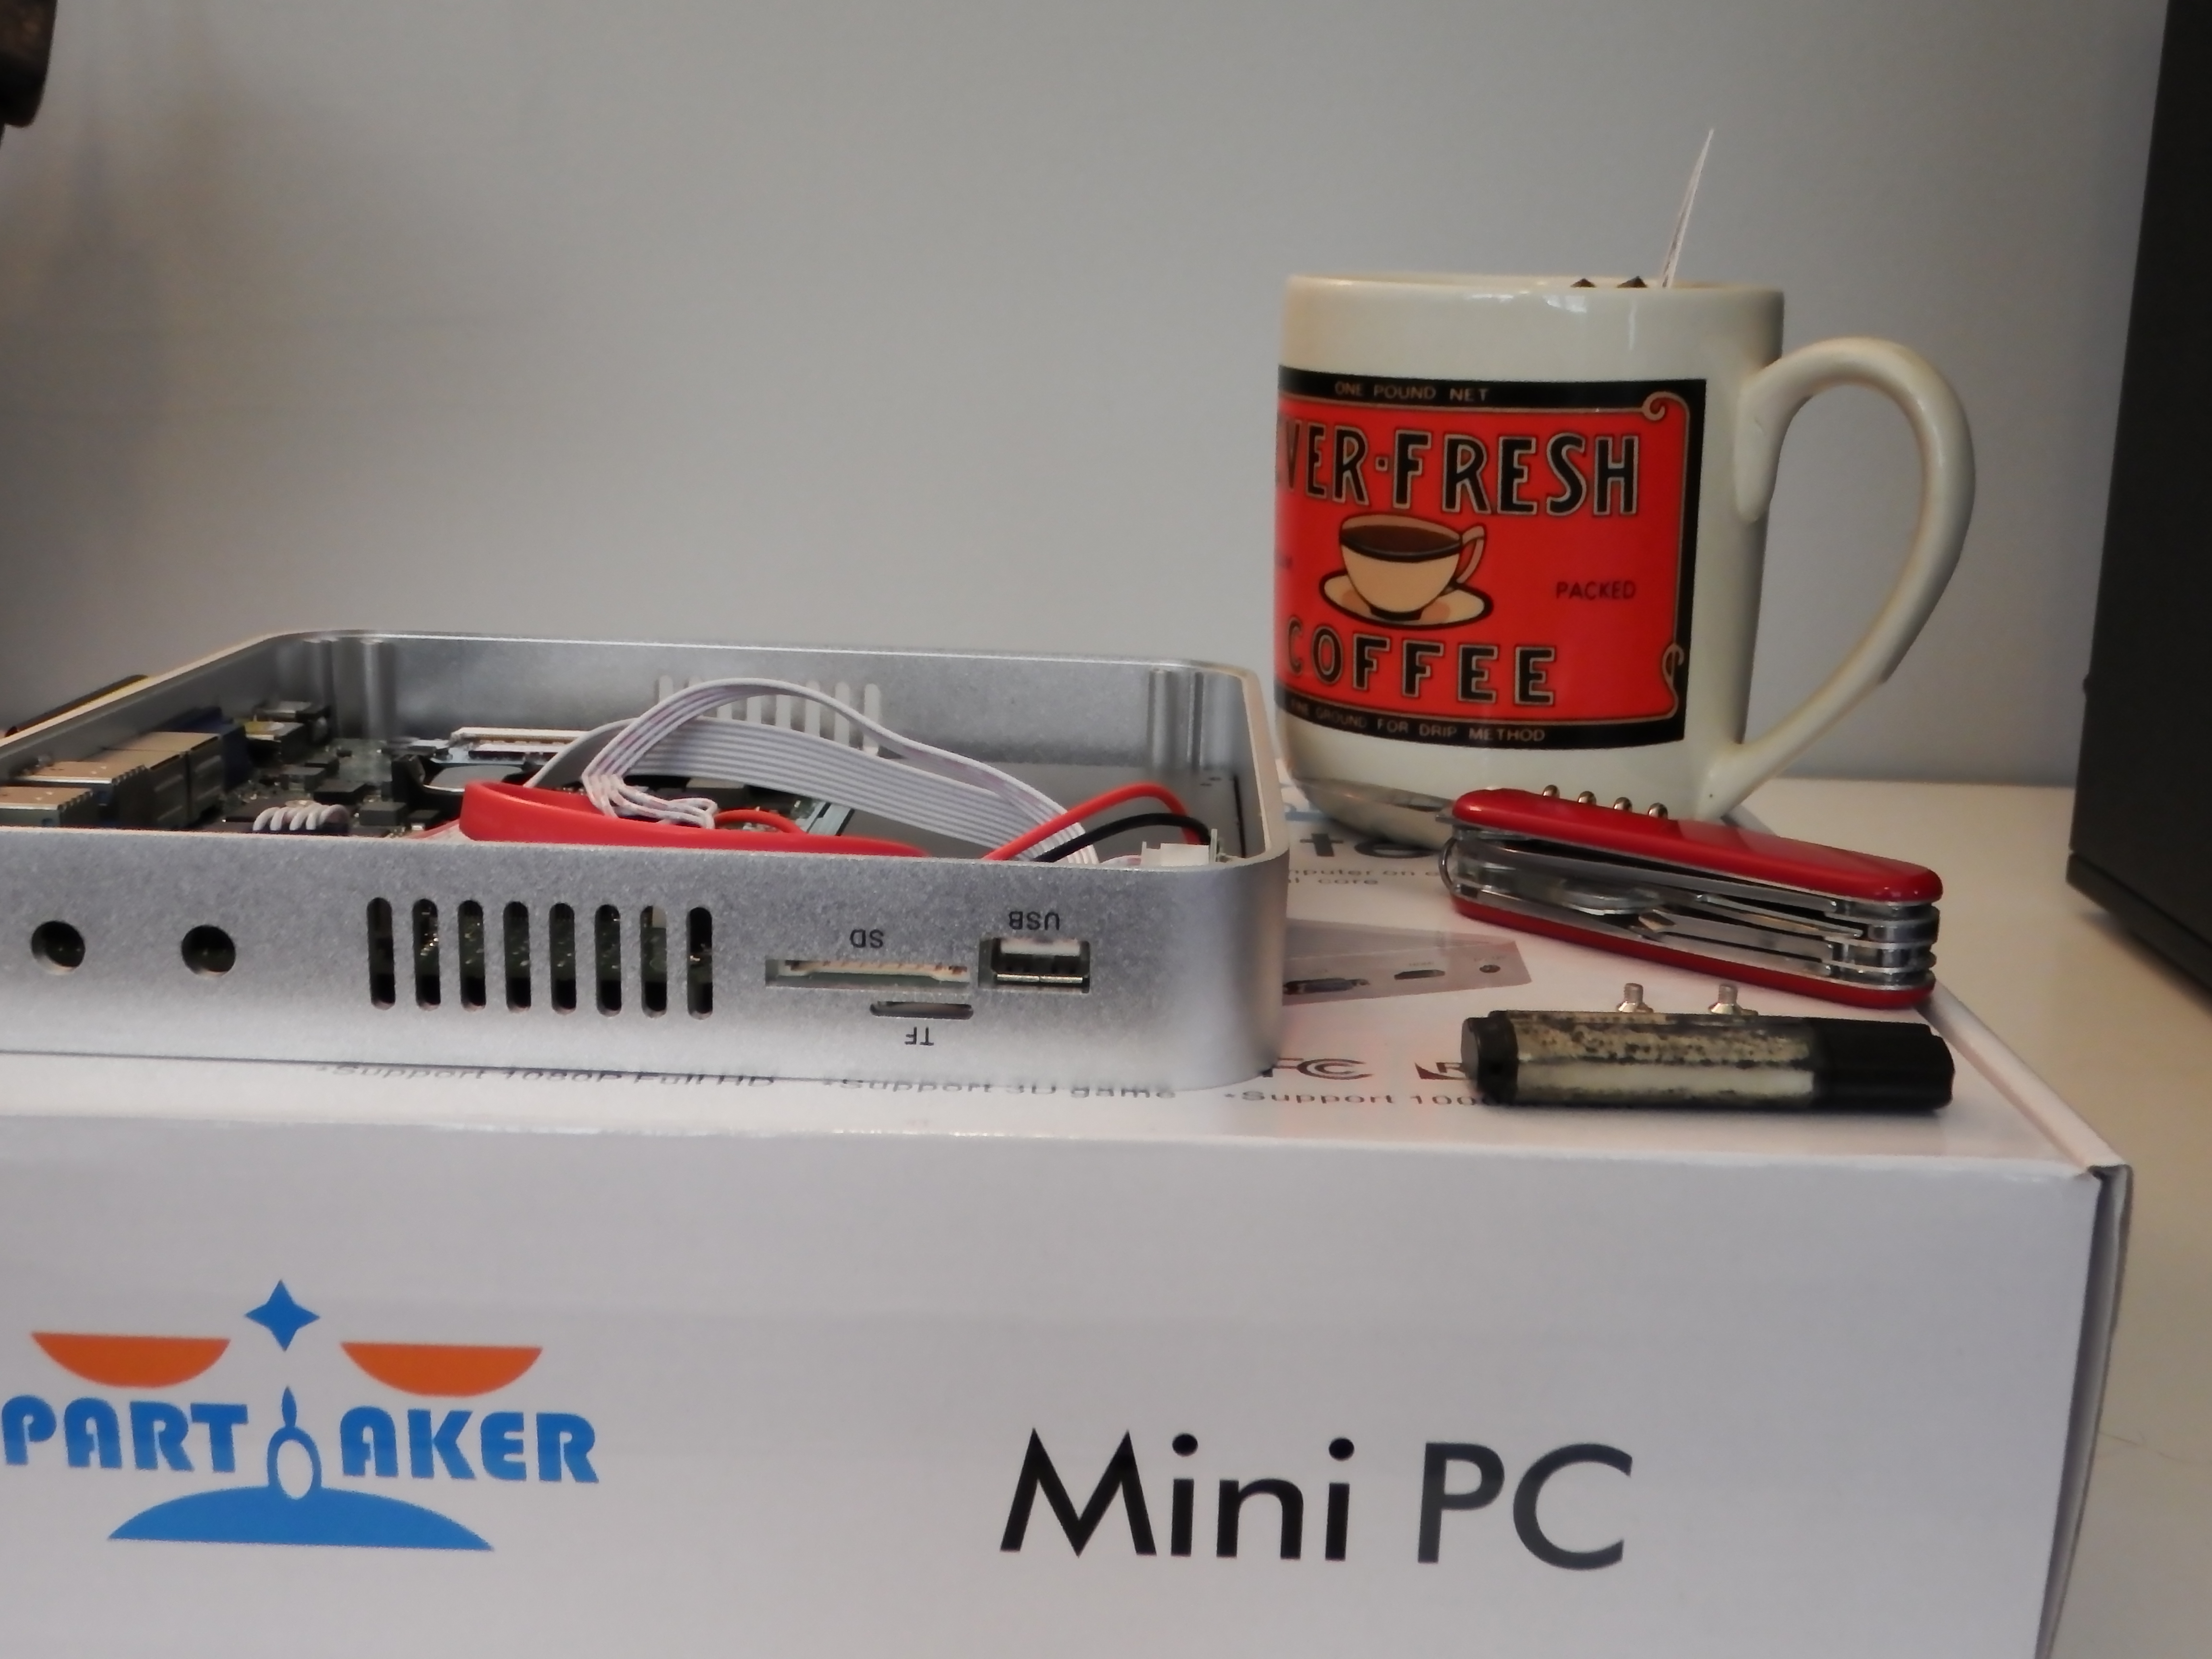
Since the Partaker mini-PC came complete except for the SSD, there really wasn't much of a hardware "build" process on my end. Basically, all it took was plugging in one SATA and one SATA power cable. Whether that's a feature or a bug depends on just how badly you want to feel like you turned a bunch of screws.
Jim Salter
This image is titled "router-bad-SD-card-placement.jpg."
2 more images in gallery
The manufacturer provided four mounting holes for the storage on the removable cover plate of the router, but since I chose an SSD that weighs effectively nothing, I elected to ignore them. There's enough space to just sort of nestle it over to the side of the motherboard, and that way I don't have to worry about accidentally yanking on a cable when I remove the access plate for the router.
That's really it to the build process on this one: remove PC from box, open PC, plug in SSD, close PC, call it a day. Call it 10 minutes, really.
Router operating system
This is where the process gets a little more fun. I wanted to use plain-Jane Ubuntu Server for my router since I work professionally with Ubuntu and am extremely familiar with it. On the minus side, that doesn't come with any bells and whistles. On the plus side, that doesn't come with any bells and whistles! If you like your infrastructure lean and mean (and you don't feel itchy without a GUI) this is a pretty cool way to go. Even if you don't like it that way and you want to force yourself to learn how to make iptables go, this'll do it.
If you ultimately prefer to skip the hairy ins and outs of iptables, there are several perfectly cromulent options available to you for pre-baked router distributions with whiz-bang GUIs and all the work done for you. The most notable of these are the BSD-based pfSense and the Linux-based OpenWRT and/or DD-WRT.
There's no need for a blow-by-blow walkthrough of the Ubuntu Server install, because it's ludicrously simple. You go to the download page, you download an image (I chose, and recommend, the latest LTS release for its longer support), and you make a USB thumbdrive out of it. The actual install process is a next-fest. You boot, you install, you next your way through. You only have one disk, and the defaults are all fine. The only meaningful choices to make are your username and password and whether you want automatic security upgrades. (Spoiler: Yes, you do.)
Once that's done, reboot, log in, and now you're staring at a bash prompt.
Configuring network interfaces
The first thing to do is figure out which one of your network interfaces is which. The simplest way to do this is to go ahead and mark them (if they aren't already marked) LAN and WAN, making sure you only have the WAN interface actually plugged in. Do an ifconfig from the bash prompt on your router and see which interface has an IP address—presto, that's your WAN! Assuming you only have two interfaces (in my case, they were p1p1 and p4p1, although your mileage will very much differ with different hardware), you now also know which interface is your LAN interface. But if you're still not sure, you can always change which port your network cable is plugged into and check for an address again.
After establishing which is which, you'll configure these network interfaces with a quick sudo nano /etc/network/interfaces:
# This file describes the network interfaces available on your system
# and how to activate them. For more information, see interfaces(5).

# The loopback network interface
auto lo
iface lo inet loopback

# The WAN interface, marked Lan1 on the case
auto p4p1
iface p4p1 inet dhcp

# The LAN interface, marked Lan2 on the case
auto p1p1
iface p1p1 inet static
	address 192.168.99.1
	netmask 255.255.255.0
The loopback section will already be there, and likely you'll have something for one or both of your actual NICs there as well. Once you're done, you want something that looks like the above. Why do my comments say that the interfaces are marked "Lan1" and "Lan2"? That's merely the way the case came on my particular box, and I hadn't stickered over them yet. Comment appropriately for your own case, but please do commentand make sure your comments match what you can actually see.
Once you're done, you'll want to restart your router and make sure the changes actually worked.
Enabling forwarding in /etc/sysctl.conf
The first step to making Linux route is enabling forwarding between interfaces. This is really simple: sudo nano /etc/sysctl.conf and uncomment (remove the leading pound sign from) the line that says net.ipv4.ip_forward=1. Ctrl-X to exit, Y you want to save, and you're outta there.
# Uncomment the next line to enable packet forwarding for IPv4
net.ipv4.ip_forward=1

# Uncomment the next line to enable packet forwarding for IPv6
#  Enabling this option disables Stateless Address Autoconfiguration
#  based on Router Advertisements for this host
#net.ipv6.conf.all.forwarding=1
The change you made will be live after a reboot, or you can speed things up by doing a quick sudo sysctl -p to force the changes you made to take effect immediately.
Creating and starting a skeleton ruleset
Now that your PC knows it's supposed to be a router, the next step is making sure it's choosy about what it forwards and when it does so. To do that, we want to build a firewall ruleset and make sure it's applied before the network interfaces go live.
First, let's sudo nano /etc/network/if-pre-up.d/iptables to create a startup script and populate it:
#!/bin/sh
/sbin/iptables-restore < /etc/network/iptables
Now, sudo chown root /etc/network/if-pre-up.d/iptables ; chmod 755 /etc/network/if-pre-up.d/iptables. This first tells the system that your script is owned by root, then the command tells the system that it's writeable only by root and readable and executable by anybody. Since our script is in the if-pre-up.d directory, it will be run before the network interfaces become available, ensuring that we won't ever be online without our ruleset protecting us.
/etc/network/iptables
To start out, we're going to create the bare minimum necessary for iptables-restore not to cough up a hairball. Create a new ruleset with sudo nano /etc/network/iptables and populate it like this:
*nat
:PREROUTING ACCEPT [0:0]
:INPUT ACCEPT [0:0]
:OUTPUT ACCEPT [0:0]
:POSTROUTING ACCEPT [0:0]

COMMIT

*filter
:INPUT ACCEPT [0:0]
:FORWARD ACCEPT [0:0]
:OUTPUT ACCEPT [0:0]

# Service rules
-A INPUT -j DROP

# Forwarding rules
-A FORWARD -j DROP

COMMIT
Let's take a moment and understand the basic anatomy of our ruleset before we go adding more stuff. There are two sections, *nat and *filter. Each section begins with the appropriate *declaration and ends with COMMIT. If you don't get this right—if you don't have one of the sections, or mistype its name, or fail to end it with a COMMIT statement—your ruleset won't work right. That will be a bad time.
So far, this basic skeleton ruleset doesn't actually do much of anything, but it is the framework that we'll build upon to make our router do what we expect. Understanding it now, before it gets fleshed out, will help a lot when you're ready to actually work on it.
Enabling NAT
At this point, we have a PC that knows how to accept a packet on one interface, and if it's destined for an address on another interface, put it there. Since we haven't actually applied our "default drop" skeleton ruleset yet, the router isn't picky about who it comes from, what it is, or who it's going to, it just does it. It also doesn't do Network Address Translation, which is the technology that lets you have a private network full of unrouteable addresses like 192.168.0.1 while still reaching public, routeable Internet addresses like 50.31.151.33. In short, we've got some work to do.
We know which port is which, so let's set them up and comment them in our iptables ruleset right away. It's also time to insert the rule that turns NAT on. sudo nano /etc/network/iptables and:
*nat
:PREROUTING ACCEPT [0:0]
:INPUT ACCEPT [0:0]
:OUTPUT ACCEPT [0:0]
:POSTROUTING ACCEPT [0:0]

# p4p1 is WAN interface, #p1p1 is LAN interface
-A POSTROUTING -o p4p1 -j MASQUERADE

COMMIT
There you have it: one is LAN, one is WAN, and you have Network Address Translation between the two. We're still not quite ready to tap into the Internet, however. You almost certainly want your router handing out IP addresses on its LAN interface, just like any router you bought from the store would.
To go ahead and apply our new NAT-enabled ruleset, do a quick sudo /etc/network/pre-up.d/iptables. This will reload iptables' ruleset with whatever we've entered into /etc/network/iptables (which, so far, boils down to "pack sand buddy, no packets for you!").
This same command—sudo /etc/network/pre-up.d/iptables—is the one we'll run whenever we've made a change to our ruleset and want to apply the new rules.
Setting up DHCP and DNS
Setting up your router to handle DHCP duties is easy. sudo apt-get install isc-dhcp-server and configure it by inserting a subnet clause into /etc/dhcp/dhcpd.conf.
subnet 192.168.99.0 netmask 255.255.255.0 {
	range 192.168.99.100 192.168.99.199;
	option routers 192.168.99.1;
	option domain-name-servers 192.168.99.1;
	option broadcast-address 192.168.99.255;
}
You can probably figure all that out for yourself. The local network will be 192.168.99.x, the router itself will live on 192.168.99.1, the router will serve up DNS itself, and the broadcast address goes where the broadcast address always should. To apply the configurations we just made, you just sudo /etc/init.d/isc-dhcp-server restart. Finally, we're handing out IP addresses.
We're still missing a local DNS facility, though, which our DHCP server settings explicitly promise to provide. That's even easier: sudo apt-get install bind9. No additional configuration needed.
Allowing DNS and DHCP client access
At this point, we have basically everything configured, but our router is incurably paranoid. It knows how to resolve DNS queries, hand out IP addresses, and forward traffic, but it categorically refuses to actually do any of that stuff. We need to create some rules about what it's allowed to forward and what it's allowed to accept.
Open up /etc/network/iptables in nano (or another editor of your choice), and let's get to work on the service ruleset.
# Service rules

# basic global accept rules - ICMP, loopback, traceroute, established all accepted
-A INPUT -s 127.0.0.0/8 -d 127.0.0.0/8 -i lo -j ACCEPT
-A INPUT -p icmp -j ACCEPT
-A INPUT -m state --state ESTABLISHED -j ACCEPT

# enable traceroute rejections to get sent out
-A INPUT -p udp -m udp --dport 33434:33523 -j REJECT --reject-with icmp-port-unreachable

# DNS - accept from LAN
-A INPUT -i p1p1 -p tcp --dport 53 -j ACCEPT
-A INPUT -i p1p1 -p udp --dport 53 -j ACCEPT

# SSH - accept from LAN
-A INPUT -i p1p1 -p tcp --dport 22 -j ACCEPT

# DHCP client requests - accept from LAN
-A INPUT -i p1p1 -p udp --dport 67:68 -j ACCEPT

# drop all other inbound traffic
-A INPUT -j DROP
With this configuration, we're still too paranoid to let traffic get out to the Internet, but at least now we're willing to let the machines on our LAN get IP addresses of their own and resolve DNS hostnames. We're also willing to allow pings and traceroutes (in this case, from any interface). Finally, we've allowed SSH access from the LAN to the router so that we don't have to physically plug a keyboard into it every time we want to make a change.
If you're blindly copying and pasting along with this guide, remember one thing: p1p1 was my LAN interface name, but it might not be yours. Go back and look at your notes from setting up the interfaces and make sure to get this right.
Allowing traffic out to the Internet
We're going to keep this one super simple: all of our local machines are allowed to get to the Internet and do whatever they want.
# Forwarding rules

# forward packets along established/related connections
-A FORWARD -m conntrack --ctstate RELATED,ESTABLISHED -j ACCEPT

# forward from LAN (p1p1) to WAN (p4p1)
-A FORWARD -i p1p1 -o p4p1 -j ACCEPT

# drop all other forwarded traffic
-A FORWARD -j DROP
At this point, you have a credibly working router. It hands out IP addresses, it resolves DNS queries, and it passes traffic back and forth between the LAN and the Internet. Equally important, nothing on the Internet is allowed to access anything on the LAN. Still, there is one last feature to add before considering this project done.
Port Forwarding from the Internet to the LAN
Honestly, this is the one part of running a barebones router via iptables that I find obnoxious—port forwarding, aka creating "pinholes" to service Internet clients from LAN servers. On a consumer router's Web interface, this is a single step. You pick a local IP address, you pick a protocol and port, and you say "allow traffic for TCP port n to local IP address nnn.nnn.nnn.nnn."
With iptables, though, you'll need two separate entries for each forwarded service. In this example, we're going to forward TCP port 80 (the HTTP service) through the router to a local IP address. We need this in order to actually test the router's throughput from WAN to LAN.
First, you'll need to create an entry in the *nat section:
*nat
:PREROUTING ACCEPT [0:0]
:INPUT ACCEPT [0:0]
:OUTPUT ACCEPT [0:0]
:POSTROUTING ACCEPT [0:0]

# p4p1 is WAN interface, #p1p1 is LAN interface
-A POSTROUTING -o p4p1 -j MASQUERADE

# NAT pinhole: HTTP from WAN to LAN
-A PREROUTING -p tcp -m tcp -i p4p1 --dport 80 -j DNAT --to-destination 192.168.99.100:80

COMMIT
That PREROUTING line tells the router that arbitrary traffic from the Internet—traffic that isn't already associated with an outbound connection from the LAN—targeted to port 80 should be forwarded into the local machine at 192.168.99.100. Since we have a default DROP rule on our forwarding ruleset, though, we'll also need to add a rule there allowing that traffic to be forwarded now that we know how to forward it.
# Forwarding rules

# forward packets along established/related connections
-A FORWARD -m conntrack --ctstate RELATED,ESTABLISHED -j ACCEPT

# forward from LAN (p1p1) to WAN (p4p1)
-A FORWARD -i p1p1 -o p4p1 -j ACCEPT

# allow traffic from our NAT pinhole
-A FORWARD -p tcp -d 192.168.99.100 --dport 80 -j ACCEPT

# drop all other forwarded traffic
-A FORWARD -j DROP
If we screw this up—if we forget either the PREROUTING rule or the FORWARD rule, or if we put the PREROUTING rule in the *filter section or the FORWARD rule in the *nat section—our router will cough up a hairball and either refuse to load the ruleset at all or just fail to actually get the traffic through the pinhole where it needs to go. This isn't really hard, mind you, but it's definitely something I struggled with for a while because it seemed like none of the tutorials out there explained it adequately.
Our final, complete ruleset
I wanted to go over each piece of the ruleset separately to make sure we understand what we're doing. If you're following along at home, though, that way leads to a bunch of potential mistakes. So here is the complete ruleset, in one piece, with comments.
Again, please remember, your interface names are likely different from mine.Don't just copy "p1p1" and "p4p1" and wonder why it doesn't work. You need to use the names that go with your equipment.
*nat
:PREROUTING ACCEPT [0:0]
:INPUT ACCEPT [0:0]
:OUTPUT ACCEPT [0:0]
:POSTROUTING ACCEPT [0:0]

# p4p1 is WAN interface, #p1p1 is LAN interface
-A POSTROUTING -o p4p1 -j MASQUERADE

# NAT pinhole: HTTP from WAN to LAN
-A PREROUTING -p tcp -m tcp -i p4p1 --dport 80 -j DNAT --to-destination 192.168.99.100:80

COMMIT

*filter
:INPUT ACCEPT [0:0]
:FORWARD ACCEPT [0:0]
:OUTPUT ACCEPT [0:0]

# Service rules

# basic global accept rules - ICMP, loopback, traceroute, established all accepted
-A INPUT -s 127.0.0.0/8 -d 127.0.0.0/8 -i lo -j ACCEPT
-A INPUT -p icmp -j ACCEPT
-A INPUT -m state --state ESTABLISHED -j ACCEPT

# enable traceroute rejections to get sent out
-A INPUT -p udp -m udp --dport 33434:33523 -j REJECT --reject-with icmp-port-unreachable

# DNS - accept from LAN
-A INPUT -i p1p1 -p tcp --dport 53 -j ACCEPT
-A INPUT -i p1p1 -p udp --dport 53 -j ACCEPT

# SSH - accept from LAN
-A INPUT -i p1p1 -p tcp --dport 22 -j ACCEPT

# DHCP client requests - accept from LAN
-A INPUT -i p1p1 -p udp --dport 67:68 -j ACCEPT

# drop all other inbound traffic
-A INPUT -j DROP

# Forwarding rules

# forward packets along established/related connections
-A FORWARD -m conntrack --ctstate RELATED,ESTABLISHED -j ACCEPT

# forward from LAN (p1p1) to WAN (p4p1)
-A FORWARD -i p1p1 -o p4p1 -j ACCEPT

# allow traffic from our NAT pinhole
-A FORWARD -p tcp -d 192.168.99.100 --dport 80 -j ACCEPT

# drop all other forwarded traffic
-A FORWARD -j DROP

COMMIT
Once you're sure you've got the whole ruleset and it's adapted properly for your network and equipment, it's time to apply it. sudo /etc/network/if-pre-up.d/iptables and you're off to the races.
So, about that testing...
Several readers asked how the testing worked and how they could duplicate it. It boils down to "put one server on the LAN side, another on the WAN side, install nginx and ApacheBench on both, and get cracking." First of all, install the applications themselves on your two servers: sudo apt-get install ab nginx. Not too difficult, right?
Next up, we need to reconfigure nginx to do some kind of stupid things, like be willing to try to answer ten thousand client requests simultaneously. We'll also want nginx not to try to do "keepalives," where it keeps a connection open to listen for more than one HTTP request. Doing that would greatly limit its ability to handle multiple clients as rapidly as possible.
Open up /etc/nginx/nginx.confand replace the events{} block as follows:
events {
    # The key to high performance - have a lot of connections available
    worker_connections  19000;
}

# Each connection needs a filehandle (or 2 if you are proxying)
worker_rlimit_nofile    20000;
Now, still in /etc/nginx/nginx.conf but this time in the http{} block, make sure keepalive_requests are off:
keepalive_requests 0;
Finally, we'll need to make sure nginx has access to the ridiculous number of file handles it's going to need to service all those concurrent requests. We do that by editing /etc/default/nginx:
# Note: You may want to look at the following page before setting the ULIMIT.
#  http://wiki.nginx.org/CoreModule#worker_rlimit_nofile
# Set the ulimit variable if you need defaults to change.
#  Example: ULIMIT="-n 4096"
ULIMIT="-n 65535"
Almost done, but we're going to tune /etc/sysctl.conf, too, due to the ridiculous amount of traffic we're planning to handle. Tuning the Linux kernel for high network throughput could be a series of articles all on its own, so I'm not going to go into what each of these settings does individually. The Cliffs' Notes are 1) it makes the kernel less likely to interpret the ridiculously high volumes of traffic we're going to be dealing with as some kind of DOS attack and 2) please don't blindly do this on production equipment "because it's awesome." These settings did help get better and more consistent results with the testing we're doing here, but that doesn't necessarily mean they're the best settings everywhere.
TL;DR here are the flood-related tweaks I made in sysctl.conf on the testing servers (not on the router itself):
kernel.sem = 250 256000 100 1024
net.ipv4.ip_local_port_range = 1024 65000
net.core.rmem_default = 4194304
net.core.rmem_max = 4194304
net.core.wmem_default = 262144
net.core.wmem_max = 262144
net.ipv4.tcp_wmem = 262144 262144 262144
net.ipv4.tcp_rmem = 4194304 4194304 4194304
net.ipv4.tcp_max_syn_backlog = 4096
net.ipv4.tcp_mem = 1440715	2027622	3041430
Once again, a reboot or a sudo sysctl -p applies this stuff, and you're ready to start abusing nginx.
The testing script
This part was pretty simple. Just run a bunch of http tests as described in last month's article: 10K, 100K, and 1MB files fetched with concurrency (number of simultaneous clients running) of 10, 100, 1,000, and 10,000 apiece.
#!/bin/bash
mkdir -p ~/tests
mkdir -p ~/tests/$1
ulimit -n 100000

ab -rt180 -c10 -s 240 http://192.168.99.100/10K.jpg 2>&1 | tee ~/tests/$1/$1-10K-ab-t180-c10-client-on-LAN.txt
ab -rt180 -c100 -s 240 http://192.168.99.100/10K.jpg 2>&1 | tee ~/tests/$1/$1-10K-ab-t180-c100-client-on-LAN.txt
ab -rt180 -c1000 -s 240 http://192.168.99.100/10K.jpg 2>&1 | tee ~/tests/$1/$1-10K-ab-t180-c1000-client-on-LAN.txt
ab -rt180 -c10000 -s 240 http://192.168.99.100/10K.jpg 2>&1 | tee ~/tests/$1/$1-10K-ab-t180-c10000-client-on-LAN.txt

ab -rt180 -c10 -s 240 http://192.168.99.100/100K.jpg 2>&1 | tee ~/tests/$1/$1-100K-ab-t180-c10-client-on-LAN.txt
ab -rt180 -c100 -s 240 http://192.168.99.100/100K.jpg 2>&1 | tee ~/tests/$1/$1-100K-ab-t180-c100-client-on-LAN.txt
ab -rt180 -c1000 -s 240 http://192.168.99.100/100K.jpg 2>&1 | tee ~/tests/$1/$1-100K-ab-t180-c1000-client-on-LAN.txt
ab -rt180 -c10000 -s 240 http://192.168.99.100/100K.jpg 2>&1 | tee ~/tests/$1/$1-100K-ab-t180-c10000-client-on-LAN.txt

ab -rt180 -c10 -s 240 http://192.168.99.100/1M.jpg 2>&1 | tee ~/tests/$1/$1-1M-ab-t180-c10-client-on-LAN.txt
ab -rt180 -c100 -s 240 http://192.168.99.100/1M.jpg 2>&1 | tee ~/tests/$1/$1-1M-ab-t180-c100-client-on-LAN.txt
ab -rt180 -c1000 -s 240 http://192.168.99.100/1M.jpg 2>&1 | tee ~/tests/$1/$1-1M-ab-t180-c1000-client-on-LAN.txt
ab -rt180 -c10000 -s 240 http://192.168.99.100/1M.jpg 2>&1 | tee ~/tests/$1/$1-1M-ab-t180-c10000-client-on-LAN.txt
Make sure you have appropriately sized JPEGs at /var/www/10K.jpg, /var/www/100K.jpg, and /var/www/1M.jpg, and you're ready to go. If you saved the script as test.sh, you invoke it as ./test.sh routernameand give it a while. Some 48 minutes later, you'll have a bunch of raw apachebench results in appropriately named files under ~/tests/routername, which will include the throughput numbers we looked at in last month's article along with a fair amount more information that tells you more about the webserver than it does about the network the transactions took place on. (Obviously, the same script with a different IP address and with filenames ending in "-client-on-WAN" was used for the download-side of the testing.)
This is a fairly rough-and-ready test, of course. The underlying metrics that we're really pushing are the maximum packets per second (PPS), the total network bandwidth available, and the maximum number of entries in the router's NAT table. I kinda like my rough-and-ready test, though, since it gives me a fairly direct set of real-world numbers rather than arbitrary synthetics. Downloading data over HTTP is something I'll really be doing a lot of. For example, if a bunch of TCP connections are being arbitrarily reset, that will show up in these benchmarks, where they might not in a more "advanced" suite that more directly tests pure, raw PPS.
Still more to come
If a raw iptables setup isn't to your liking or even if you just don't like my choice of hardware, that's OK. In the next story in this router series, we'll test some of the most popular items from the comments: a brand-new Mikrotik hAP_ac router (with wired performance better than the wired-only routerboard 450), a PCEngines apu14d, a Ubiquiti EdgeRouter Pro, and a Ubiquiti USG (performance like an EdgeRouter Lite, but this ties into the easy-mode Unifi management interface). We'll also take a look at running pfSense and OpenWRT on the homebrew and see how (or if) they impact its throughput.
Jim Salter (@jrssnet) is an author, public speaker, small business owner, mercenary sysadmin, and father of three—not necessarily in that order. He got his first real taste of open source by running Apache on his very own dedicated FreeBSD 3.1 server back in 1999, and he's been a fierce advocate of FOSS ever since. He also created and maintains the Sanoid platform.

In one of more impressive hacks in recent memory, researchers have devised an attack that exploits physical weaknesses in certain types of DDR memory chips to elevate the system rights of untrusted users of Intel-compatible PCs running Linux.
The technique, outlined in a blog post published Monday by Google's Project Zero security initiative, works by reversing individual bits of data stored in DDR3 chip modules known as DIMMs. Last year, scientists proved that such "bit flipping" could be accomplished by repeatedly accessing small regions of memory, a feat that—like a magician who transforms a horse into a rabbit—allowed them to change the value of contents stored in computer memory. The research unveiled Monday showed how to fold such bit flipping into an actual attack.
"The thing that is really impressive to me in what we see here is in some sense an analog- and manufacturing-related bug that is potentially exploitable in software," David Kanter, senior editor of the Microprocessor Report, told Ars. "This is reaching down into the underlying physics of the hardware, which from my standpoint is cool to see. In essence, the exploit is jumping several layers of the stack."
Read 10 remaining paragraphs | Comments

If your PC won’t start then you might try to recover the situation by booting from some other recovery environment: your Windows DVD, an antivirus disc, backup tool, whatever it might be.
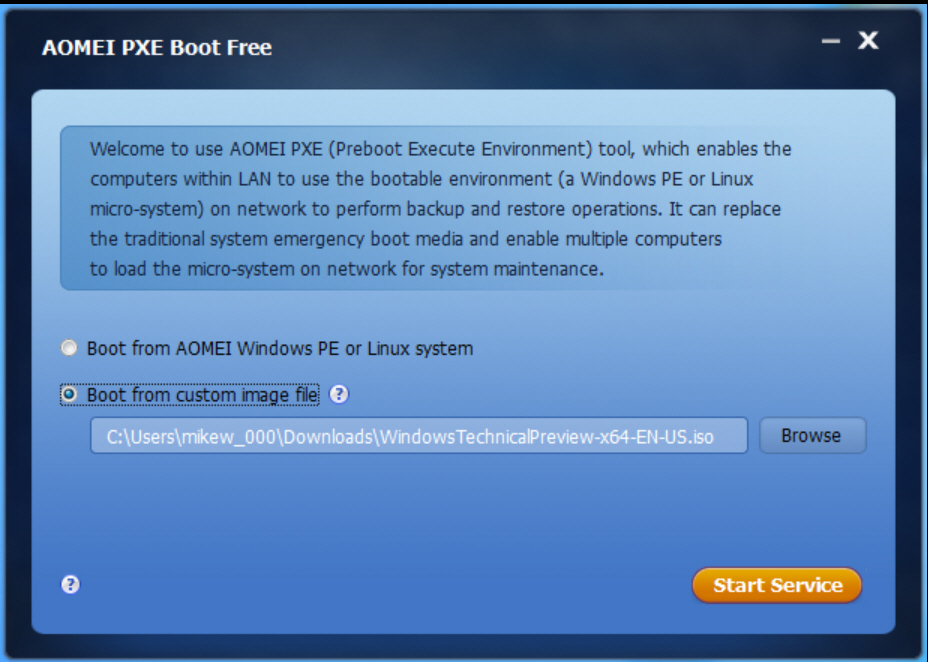
If you can’t find that disc -- or maybe your computer doesn’t have a working disc drive -- then you can alternatively boot from an ISO image held on another computer, with a little help from AOMEI’s new PXE Boot Free.
To try this out you must first install AOMEI PXE Boot Free on a central computer in your network. Point the program at your preferred ISO image, start its service, and that’s it: your preparations are complete.
Now, if you need to start a computer from that environment, there’s no longer any need for DVDs or USB keys. Just switch the system to "Network boot" in the BIOS, and as long as it’s connected to the same network as the AOMEI PXE Boot Free computer, it should boot from your source image. Eventually, anyway (naturally it’ll take a few minutes longer than usual).
AOMEI says the program doesn’t currently work with UEFI PCs. We’re not sure why, and didn’t test that specifically, but it’s a significant limitation.
If you can live with that, AOMEI PXE Boot Free is a very straightforward tool, easy to use and with plenty of documentation to help you get it working properly.

